Zone4 and Nordiq Canada welcomes you to the new Cross Country Skiing National Membership System
Welcome Cross Country Ski Clubs who are new to Zone4! We hope that the System will help make it easy for Members to register for your Club, and also be helpful to your Administrators in organizing your membership registration. If you need any assistance with using Zone4 and with setting up your Membership Registration, please feel free to contact us at support@zone4.ca or 1-888-444-0199, and we would be happy to help you out.
How to Get Started
Most clubs in Canada already have an account, but if your club doesn’t have one yet, you must apply for a club account here to get started: https://zone4.ca/signup Zone4 will contact you to review your club’s needs and provide any assistance you need in getting going. Zone4 will approve you club account and you will be emailed further setup and login instructions.
Once your Zone4 club account is setup, you can log into your account from the Zone4 homepage at https://zone4.ca/. Select the admin sign in button pictured below.

Once there, type in your Club Username/Email and Password to gain access to your Club Account.

If you have more than one Administrator that you would like to have access to the Club Account, you can add them and give them specific permission for access by using our Club Administrator Multi-User Permission Function. More information about this, and how to set it up go here: http://help.zone4.ca/kb/permissions/
Join/Renew your club with your Division
In order to join your Division each year, you must click the Join a Division button. This is under the club settings section of your club overview tab as is pictured below. Scroll down to your Division, click Join,fill out the form and sign the waiver. Full details here: https://help.zone4.ca/kb/division-settings/

Enter your club’s remittance/EFT debit info
Registration deposit and invoice debits cannot be processed until bank account information is provided for your club. This is required because divisions are not accepting cheque payments for fees any more and all funds are being transferred by EFT debit/credit. Remittance account setup instructions are detailed here: https://help.zone4.ca/kb/remittance-faq/
Creating your Registration form
This documentation does not have step by step guides for creating a registration form, but does highlight steps and recommendations unique to creating a registration form for CCC clubs. Step by step guides are linked to below and are recommended reading so that you have a good understanding of how to build registration forms. This knowledge will be useful for understanding the steps covered in this documentation.
- Step 1:Create a Registration Form: https://help.zone4.ca/kb/1-create-a-registration/
- Step2: Edit Fields: https://help.zone4.ca/kb/2-edit-form/
Create a CCC Club Specific Registration Form
When you create a registration form for CCC clubs it is recommended that you select the settings pictured below and that you use the CCC Membership Template. Using this template will automatically add all required CCC fields to your registration form as well as add many recommended fields that you can edit or remove. This will give you a good starting point especially if you’re unfamiliar to Zone4.

Editing Fields
Cart Level Fields
The Cart Level Fields section is to display information and fields that pertain to an entire group/ family that is registering together. Often Clubs place general instructions or information about the Club or about it’s Membership here. Also, Clubs that have a “Family Membership” price will often place the Fee Field in the Cart Level Fields. The Registrant would choose the Family Price only once in their registration. If you have selected the CCC Membership Template then cart level fields will appear as is pictured below. You can edit, delete or add fields to meet your clubs unique needs. This template is designed to give you a starting point. Most clubs will then edit these fields especially when it comes to the fees.


Individual Level Fields
The Individual Fields section is where registrants will fill in fields for each individual member. As with Cart Level Fields, if you selected the CCC Membership Template, there will be pre-selected fields already displayed. If, when, you were creating your registration form you did not choose a template then select the CCC membership field from the Preset Fields menu as is pictured below. Doing this will add many mandatory CCC fields. 
The fields that have the Cross Country Canada symbol beside them are specific fields that Cross Country Canada needs for reporting purposes. You can Edit these fields, but you cannot Delete them. Other fields without the CCC symbol are simply recommended fields for club registrations. You can delete or edit these fields by using the Edit and Del buttons beside each field. Some fields such as Fees will most likely be edited as every club has a different fee structure. You can also create new fields to add to the registration that are specific to your Club by selecting the Insert Field option.
NSO Categories
Most ski club’s include the registration for their club programming in their general registration form however Club programming is another step that needs to be linked with CCC’s database. You will do this by selecting an NSO (National Sports Organization) category to associate each one of your relevant program registration fields. Not all types of programs need to be linked, only programs included in the drop down menu. If you’re unsure which CCC program your club program fits into find out more here. Keep in mind that the naming for your club program does not need to be the same as what CCC uses. Shown below in an example of NSO categories being assigned using a “Single Choice Fee Group” field.
 If you used the CCC Membership Template then some programming fields will already have been set. You will still need to associate these fields with NSO categories as this was not done on the template. Registrants can be assigned to more then one NSO category and everyone will be automatically registered as General Member.
We have members in our club that are not CCC Members
A number of clubs have mixed registrations with cross country members as well as biathlon, alpine, or other sports that do not get reported as members to CCC. In order to not have them charged the CCC/Division fees, use the Non-CCC Member NSO Category.
Unique CCC Features
Here is a quick explanation of some CCC specific features that will be on your registration form.
CCC Membership Panel & Waiver
The CCC Membership Panel is an automatic feature that calculates, for each member, the amount of the Membership fees that are due to both your Provincial Division, and Cross Country Canada. At the time of registration, these fees will automatically be deducted from the total registration fees, and sent to the governing bodies. We hope this will greatly assist Club Administrators because it will help simplify your process of reporting members and submitting membership fees to your Division and CCC. These fields will be automatically selected when using the CCC Membership Template. The Provincial division waiver will be selected based on the division your club joined. Note that not all divisions have automatic waivers.

Cross Country Ski de Fond Canada Survey
Cross Country Canada’s Survey questions (pictured below) are automatically placed on your Membership Registration so that they may collect some data to create relevant statistics which will enable CCC to improve service to their Membership.

Once you have Finished Building your Form
Testing
Once you’re done building your form it is important to preview the public side of the form. Do this by using the Preview Public Form button pictured below.
 In this preview you can even run test transactions (no money will be charged) to see how your form looks and flows for your registrants. You can send the registration form to a club executive by copying the URL of the preview page. This way they can test everything out and provide feedback. This is an important step for you to test out all aspects of the registration process and ensure it’s working as desired before anything is processed live.
Publish
When you are finished testing, click the publish tab as is pictured below. Once this is done you can request approval to go live. If there are any issues needing fixing, they will either be flagged automatically before the form is displayed or else caught by Zone staff upon review.

Once you have submit the form, Zone4 staff reviews it and you will receive an e-mail back with once approved or else recommended or required changes.
Once the registration is switched over to Live Mode, you can link directly to it from your own website. It will also be displayed in the main Zone4.ca online registration index at: http://zone4.ca. Registrants will be able to register at any time and pay by credit card, or cash/cheque if you have allowed that option. They will be e-mailed a receipt which includes the full itemized listing of all of their fees and people in their cart and any needed instruction regarding cash/cheque payments.
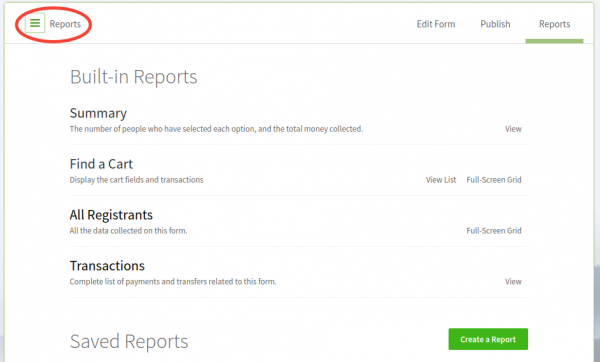
At any point, you can access the extensive Registration Reporting in the reports tab pictured below. To learn more about Registration Reporting click here. Note that the reporting tab will be empty before your registration goes live.
 If you need to manually enter some registrants, you can do so in the Find a Cart tab.