For clubs that elect not to have their members register online through the system, it is still mandatory to submit membership information for invoicing, insurance and reporting purposes. This guide is designed to walk you through the process.
The key concepts are:
- You must create a ‘registration form’ to collect your data. This registration form will contain JUST this year’s data which will help keep your reporting simple.
- All membership information must be uploaded by CSV file or entered manually into this registration form.
- All invoices will be issued by email statement and paid by EFT (Electronic Funds Transfer) through Zone4’s automatic debit system.
How to Get Started
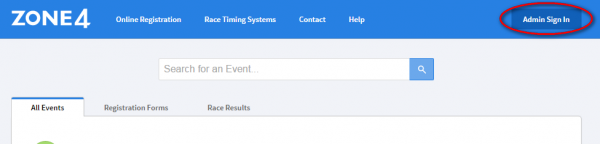
Log into your Zone4 account from the Admin Sign In button on our Zone4 homepage at http://zone4.ca/
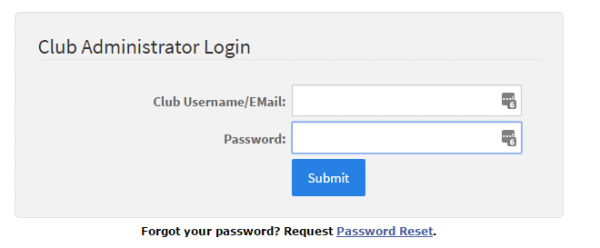
In the Club Services Login area, type in your Username/Email and Password to gain access to your Club Account. If you cannot remember your password, use the Password Reset function and enter the email address that you normally login to your club account with.
Home Page
Upon login, you are taken to your admin user specific home page. See here for more details about general site navigation: https://help.zone4.ca/kb/getting-started/
Join/Renew your club with your Division
In order to join your Division each year, you must renew your division membership. See here for more details.
Create your Registration form
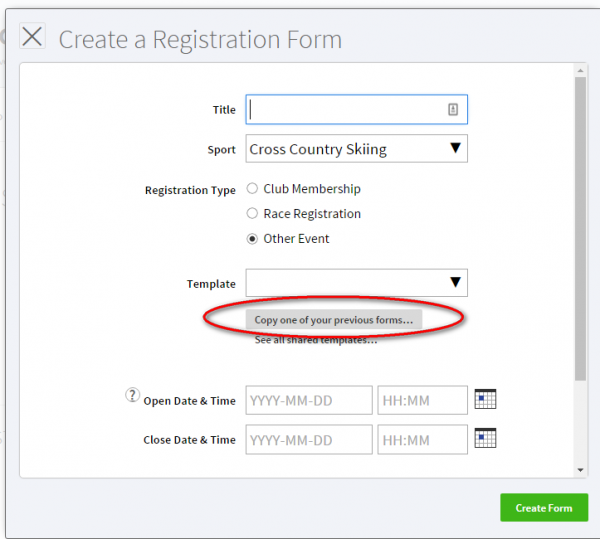
From your user home or the club overview page click Create a Form to start building a new registration form.

Note most clubs will simply copy their registration form from last year so that all their settings are the same and all you have to do is adjust the fees and text that has changed. Below is where to select to Copy an existing form when building a new registration. If you havn’t ever created a registration form before, choose one of the Templates from the template drop down which are provided by Zone4 and your division to get you up and running quickly.
For instructions on registration settings see here.
Configure your Individual level fields
The Individual Fields section is for information that is specific to each club member (as opposed to the Cart Level fields which are for data common to everyone in a cart – something you won’t need if just doing basic manual entry – more details here: Cart & Individual Level Fields)
On the Individual fields area there is a preview of the fields on your registration with the Cross Country Canada symbol beside specific ones that required by Cross Country Canada needs for reporting purposes. You can Edit these CCC fields, but you cannot Delete them. You can delete any other fields on the Registration Template but clicking the “Del” button beside that field, and you can also create new fields to add to the registration that are specific to your Club by selecting them from the list on the left hand side of the page. Think about what information you might want to track on your members and this will help you in deciding what fields you would like on your form. Some possible fields you may want to add are Membership Fees, Program Fields such as SDP, and Volunteer Information. For complete details see here.
CCC Membership Panel
The CCC Membership Panel is an automatic field that calculates for each member the amount of the Membership fees that are due for your Provincial Division, and for Cross Country Canada. At the time of registration, these fees will automatically be deducted from the total registration fees (if setting the registration open to the public,) and sent to the governing bodies. We hope this will greatly assist Club Administrators because it will help simplify your process of reporting members and submitting membership fees to your Division and CCC. Also, Cross Country Canada will deduct $1 per member for members who register online on Zone4 which helps offset Zone4’s processing fee of $1/person + $1/cart and if paying by credit card, 3% is added. There is not cost to the member or club for entering members manually though the admin side of the system, but CCC’s $1 discount is NOT applied in this case.

Publish your form
When you are finished testing your registration via thePreview Public Form button, go to the Publish tab where you can Request Approval to go Live. If there are any issue needing fixing, they will either be flagged automatically before the form is displayed or else caught by Zone staff upon review.

Once you have submit the form, Zone4 staff reviews it and you will receive an e-mail back with once approved or else recommended or required changes.
Manually Entering your Members
Once the registration is switched over to Live Mode, you can link directly to it from your own website if you want your members to register into it online. If you are entering people manually though, simply go to the Registration Reporting menu options of the registration https://help.zone4.ca/kb/entering-new-registrants/
Once members have been entered, your club will be automatically debited the appropriate fees. If you have allowed people to register online, Zone4 will remit collected credit card funds to your club on a weekly basis minus Division and processing fees.
Uploading Multiple Members Using CSV File
You can upload people in bulk to the registration system by using a CSV file.
Downloading CSV Template
- To Upload a CSV file, from the Registration Overview page, next to “Add a Cart
there is a “…” overflow button. Click that button and then click “Upload A CSV file.” -

- Once there, select the Download Template option pictured below.

- The template is a CSV file. This is a file type that can be read by Excel, Google Sheets, and Numbers. After you enter your registrants and save the file again, make sure to save it as a CSV file, do not save it as a different file type like .number, xls, or odf. We can only accept uploads of CSV files. Your spreadsheet program might display a message like “not all features are available” or “not all formatting will be saved”, this is okay – we don’t want to change the formating.
Entering Data
Usage Notes:
- We will not add duplicate people to your registration – if you upload a file containing somebody with the exact same first and last name as somebody who is already registered, we will ignore that person in the uploaded file
- You can add individuals to your CSV file and re-upload the same file, only new individuals will get added.
- Deleted people count in the duplicate check — if you have have uploaded a person already and then deleted them, and you upload another file with that same person will be ignored. If you want to get deleted people back, find them in your uploaded data and click the “restore” button.
- Once you have downloaded the template, do not change the names of any of the headers in your template. These must perfectly match the category names on your registration form or they will be ignored.
Mandatory Fields
Once you have downloaded your template fill in the column’s with the relevant information for your registrants. Note that any field that you have made mandatory on your registration form must be filled in in your CSV file. If any of these fields are left empty it will cause an error when you try to upload the file.
There are several fields that are always mandatory for any Cross Country Canada Membership registration. These are:
- BirthDate
- City
- EMail- (All emails will be validated so entering false email addresses will also cause errors when you upload the CSV file.)
- Fee
- FirstName
- Gender
- LastName
- PostalCode
- Province
There are also formatting requirements when filling in your CSV file. These must be followed in order for the system to recognize the data and to avoid errors when you upload the file.
- Dates — YYYY-MM-DD
- Checkboxes — Non blank is checked, blank is unchecked
- Yes/No — ‘Yes’ or ‘yes’, ‘No’ or ‘no’
- Gender — ‘M’ or ‘m’, ‘F’ or ‘f’
- Province — ‘CA-ON’ or ‘Ontario, ‘CA-BC’ or ‘British Columbia’. This is the same for any province.
Uploading File
- Once you are done entering data make sure to save your file as a CSV file not whatever program you used to open it (such as excel or google sheets). Our system only recognizes CSV files.
- Then use the Upload Registrants button pictured below and find your file on your computer. You will probably be able to find it in your “downloads” folder.

- Once you have selected your file, If your headers don’t match what you have on your registration you will be shown the screen pictured below.
 This is a field matching screen that allows you to manually confirm or change the system’s attempts to automatically match the fields.
 - Once fields have been correctly matched, the following screen will show you a preview of your data. Click Import if the data looks good.

Errors
- The import process will stop if you have errors. These can be due to mandatory fields being left blank, improper formatting or a false email’s. Note that any changes need to be made in your CSV file before trying to re-upload it. Changes cannot be made in your data preview page.
- If you have errors the system will detect the first one and display it on your screen. An example is pictured below.
 All possible errors have been covered in this documentation. Please be sure to properly review and edit bad data before trying to upload your file again.
 - Once you have corrected errors restart from the beginning of the Upload File section of this documentation.
If the upload was successful with no errors, it takes you to your Individuals report where you can see the new uploaded registrants. Note that it can take a few minutes to process large files so please be patient with the upload processing.