The Zone4 registration reporting system was developed in order for users to be able to easily organise and sort through the data from their registration forms. To learn how to use this very useful tool first navigate to the Reports tab in your registration form as pictured below.

Once there you will see that there are several Built-in reports as is pictured below.

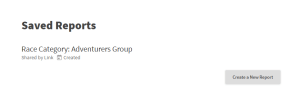
You will also see saved reports section as is pictured below. Though if you have not yet created or modified a report this section will probably be empty.
Built-in reports are the most common types of data that organizers want from their registration system. Therefore it is important to become familiar with them. You can also modify existing Built-in reports and create new reports from scratch. This will all be covered further on in the documentation.
What is a Report?
Reports are data grids that you can filter and sort so that it only displays the data you want. An example is pictured below.

Summary
The Summary is an overall report of your registration (though not a data grid). This gives you a general overview of your registration data. There are several ways to navigate to this page. It is a built-in report as is pictured above, but also has its own tab in your registration form as is pictured below.

The Summary report summarizes the total numbers registered in each of your programs and options. Below is a list of what it summarizes. Numbers correspond to the numbers visible on the image below.
- A chart of your registration’s activity by date.
- Total count and total $ value per field and option.
- A summary of total registration fees.

You can also filter the summary totals by date using the “Limit by Date” function in the upper right. This feature is also useful for filtering total per-remittance as detailed here.

Clicking on any field or option jumps you to a the Custom Report (data grid) which includes only those in that field or group. This is pictured below. This serves as a quick way of seeing who is registered in a program. These custom report quick-links can be further modified and saved as new custom reports. See the Modifying Existing Reports and Creating New Reports sections below.


Find a Cart
As with Summary Find a Cart is one of the most widely used data sets and again as with summary it has its own tab in the registration system as is pictured below.

Here you will have a list of all individual carts in your registration. Note that if a group of people registered together then they will only have one cart for the entire group as is pictured below.

When you select an individual cart you will have access to all the information from their registration. This is where you can make any changes that need to be made to correct mistakes. These can include; someone registering for the wrong category, the wrong program, mistakenly entering in faulty information etc. What carts look like will depend on what information you ask for in your registration, but an example is pictured below.

Editing Carts
Note that incomplete fields on the registration form are hidden in this view and in order to Edit a Cart you need to select the Edit Cart Option pictured below. Once this is done, incomplete fields will become visible.

Re-issuing Receipts
Often when changes need to be made to a registrants you will want to re-issue a receipt (especially if their fees have changed). To do this select the Re-issue receipt option pictured below (if the registrant has never been sent a receipt then this will be a Send Receipt option).

Once this is done you will have the option of changing the Email you’re sending the receipt to from the one the registrant has already provided on their form. Then simply select Send Receipt. This is pictured below.

Enter a Payment/ Enter a Refund
These options (pictured below) will be at the bottom of any individuals cart page.

Keep in Mind that all transactions after an individual has already registered have to be done by the event organiser. Zone4 does not issue refunds or modify payments. Therefore these payment modification options are for accounting purposes only and organisers are in charge of issuing refunds and asking for additional payments from registrants.
Once you have selected either of these options you will be able to enter the amount for the additional payment or refund and save the transaction. It is recommended to make a note of the reason behind this additional transaction. These steps are pictured below.

Adding a Cart
This is to manually add registrants to your form. Simply select the Add a Cart button in the Find a Cart tab as is pictured below.

Once this is done you will simply need to fill in the relevant information for the registrant as if they were filling out the form themselves. Once this is done you can either add another person to the cart or save changes as is pictured below.

More information on how to add carts can be found using the following link: https://help.zone4.ca/kb/entering-new-registrants/
All Registrants
This report includes all data from every individual registrant. This is a good place to start from if you want to modify an existing report as is covered next in the documentation.
Keep in mind that this is also a good tool for accessing individual carts. You will notice on the left side (pictured below) that every registrant has a cart #. If you select this number you will be brought to the cart page for that individual.

Transactions
This will give you a list of all transactions that have been made by registrants. You can sort them by type using the Transactions button or download the transactions list. These options are shown below.

Note in the Remittances report, transactions are grouped by remittance deposit. This is similar to the remittance statements that you are emailed upon each deposit. On each remittance deposit row, is a “Summary” link. That link will take you back to the Summary report with the date/time filters for that deposit pre filled so that you can get a quick summary of all the registration and fees collected in that deposit.

Modifying Existing Reports
There are several different ways you can modify existing reports. For small changes you can use the the column header to sort and filter, but for most situations it is recommended to use the Modify Report button. Both these options are pictured below.

Sorting & Filtering using Column Headers
First it is recommended to Enter Full Screen to make any modifications. When you first enter a report it will, by default, be sorted by the date that individuals registered. Each column header represents a different field in your registration form. Select the header of a field you wish to use to re-organize your report with.

Once you have selected a field you will have various sorting/ filtering options. What these are will depend on the type of field you’re sorting, but pictured below are a few options.


 registrants names). You can also select Group this column which will sort your report so that those with matching fields are grouped together.
Once you have finished modifying your report you can select the Save Copy option pictured below. This will save a copy of your modified report.
 You can give your new report a name in the area pictured below.
 You can now access your new report in the Saved Reports section of the Reports tab as is pictured below.

Modifying Reports
Though you can make modifications of your reports by using the column headers it is strongly recommended to use the Modify Report option pictured below when more significant changes to a report need to be made.

Once selected the window that will appear will have several tabs as is pictured below.

Where can I find a Modified report?


Select Columns

Sort Order
This is where you can change the column that you want to use to set the order of your report. Note that your report will, by default, be sorted by the date individuals registered. Simply select the column you wish to use to sort columns (most often name) and then Save Changes. Note that you can sort by more then one criteria (such as first name and last name). Which ever column is put on top will be the first criteria that the report will be sorted by. This is pictured below.
 Filter Rows
This is where you can limit what individuals appear in your report based off of data from your registration form. For example, you could make a report that only includes those who are; a certain gender, registered in a particular program, members of a particular club etc. Depending on which of the Built-in report you choose to modify you may already have some filter conditions pre-selected here.
You will notice that there are two different ways of limiting what individuals will be included in your report. These are if; Any one (or more) of these conditions are true and If All these conditions are true. These options are shown below.

The Second option is an “and only” option. That is to say that in the example pictured below the only individuals who will appear on your report will be those who are registered in the senior Men’s category and are under 23 years old. This would further limit the scope of your report.
 You can add as many conditions as you want using the Add Condition button. You will also notice that the options for conditions (is set to, is equal to) will change depending on what type of data those columns are collecting. It is recommended to play around with these options to get the hang of how to properly use filters.
Grouping
Grouping is for when you want to group registrants together in your report based off of certain data they have in common. For example you may want to have male and female registrants for a race in one report, but have them grouped separately. An example of this being done is pictured below.
 Another popular use for this tool is to group registrants together based off of the program they’ve registered for in a club registration. As with filters you can group based off of more then one field however if you group registrants off of more then one field.
To add a field to sort by simply select it with your cursor and save changes. You can also use the X to un-select fields as is pictured below.
 Once this is done your report will have spacers for each of the new groupings as is shown in the example below which grouped based off of club membership.

Creating a New Report
As well as being able to modify existing reports you can also create reports from scratch. To do this, first navigate to the reports tab in the registration system and select Create a Report as is pictured below.

From there you will be directed to the Create a Report page. Here you will give your report a name and decide what fields (columns) to include and whether to make your report public (this will be covered in the Download & Share section of the documentation). Fill in the relevant information for your report and select create a report. An example is pictured below.

Once this is done you will have made a new report. You can further modify this report by; Sorting the Order, Filtering and Grouping as was covered in the Modifying Existing Reports section of this documentation.
Download & Share
Once you have created a report you can download or share that report. To do this select the Download & Share button on your report page as is pictured below.
 Once there you can choose between three different sharing options which are shown and explained in the picture below.
 Keep in Mind that you should double check what information you have included in a report before sharing it or making it public as your registration form may include personal information. Your report will be private by default.
Download
You can download your report as a CSV file (readable with excel) using the download option. If you do this, be sure to double check all columns to make sure that all data was properly transferred. You may need to modify some of the column settings in excel.
Send Emails
This is a quick way of getting all the email addresses of registrants for sending out mass emails about event updates. Simply copy and paste from the list in your report.