This is a guide to setting up the registration and timing a running race. Keep in mind that this is not a complete guide to registration and timing. Having some general knowledge of how the system works before hand will help you to understand this guide.
Equipment
Recommended
- GoChip: It is highly recommended to use Zone4’s GoChip timing system for running races. This is a fail-safe, easy to set up system that can greatly reduce the number of volunteers required for timing as well as provide your event with accurate live results. Contact Zone4 to find out more about GoChip rentals. Backup should be provided using the Android Zone4 Go app keypad function.
Alternatives
- Android App: If GoChip timing isn’t feasible the alternative is to use a phone start with the Zone4 Go app keypad bib entry as a primary input device with paper bib order as a backup. You can learn how to do that here: https://help.zone4.ca/how-to-start-a-race-with-a-phone/ This method can be useful for races with under 100 participants, but because it is a manually operated function timers and volunteers can be easily overwhelmed when many racers are finishing at the same time. It is of course also much less accurate than GoChip. Plus many races these days have an expectation of chip timing and accurate results.
Registration
This is a quick guide to the recommended method of setting up your registration form for running races. See here for a complete guide to setting up an event registration.
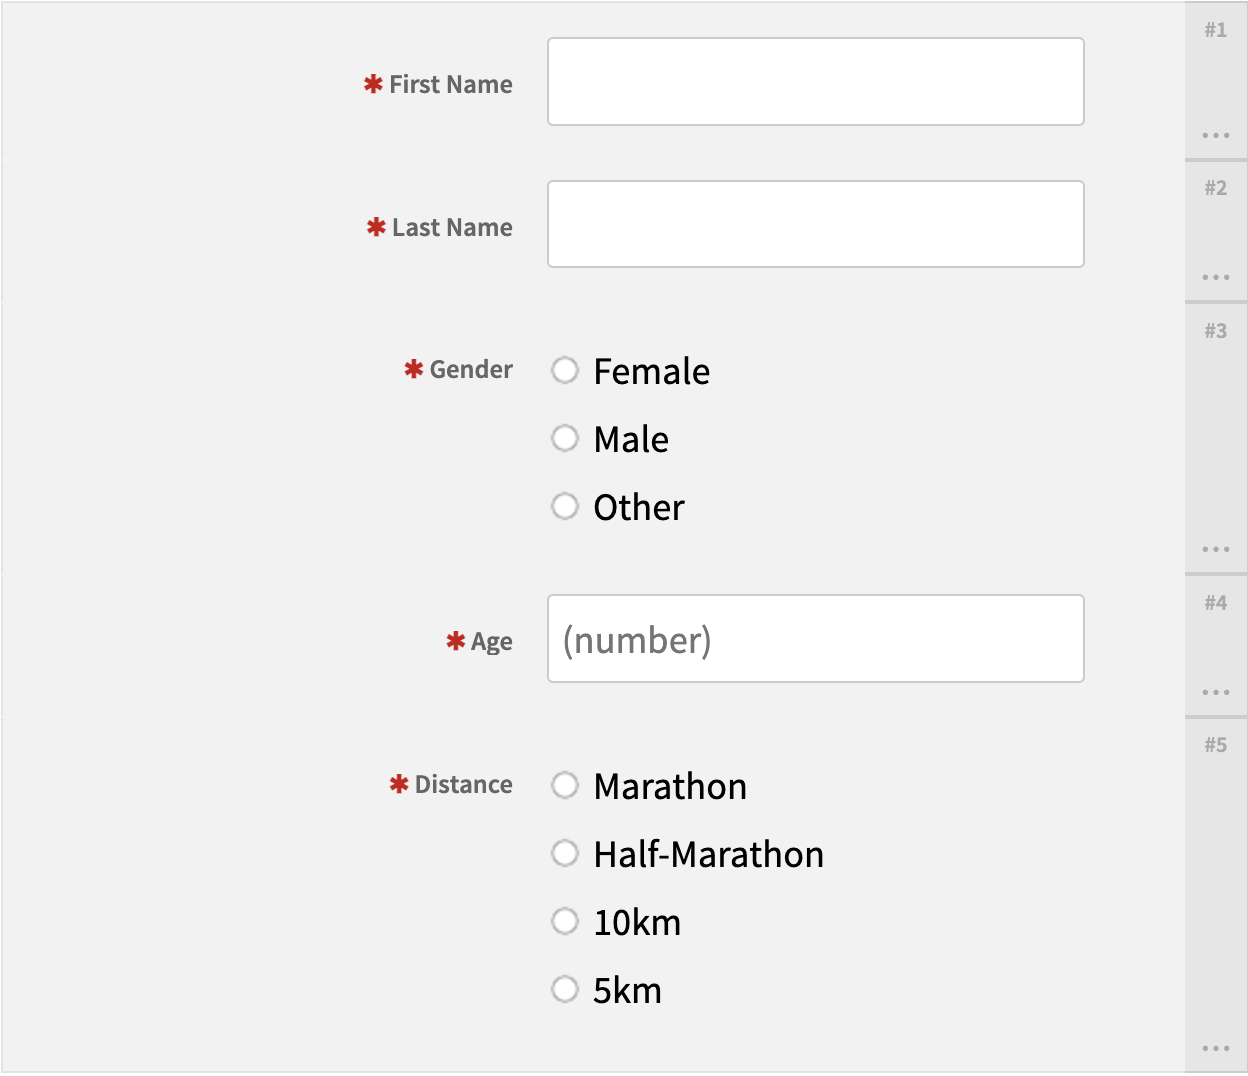
Generally when racers are registering for running races they register for a distance (e.g. 5km, 10km, Half Marathon), select a Gender (M/F), and enter their Age (21,55,etc). Instead of entering a long list of category combinations to your registration (10km Male 20-29, 5km Male 30-39) you can simplify your registration form by just adding a Gender field, a Date of Birth/Age field and a Distance field. Pictured below is an example of how your registration fields may look. To find out more about setting up categories in Zone4 Registration, see our documentation here.
Timing
This is a quick guide to setting up Zone4 timing for running races. Clicking on section titles will bring you to more complete documentation.
Create a Race
When you Create your race select “Running” as your sport. You will then have the choice of selecting either “Chip Start” or “Gun Start” as your race format. This is important as it will affect some of the default settings in Zone4 Timing. If you’re unsure which to select here is a short description of each.
- Chip Start: When your race starts racers start times are recorded when they cross the start line. This format is recommended for larger events when it will take a while for all of them to make their way across the start line. For this method you will need to have a timing point set up at your start line.
- Gun Start: When your race starts all racers start times are immediately recorded. This format is recommended for smaller events when there will not be a significant amount of time between the first and last racers across the start line.

Once the sport and format have been selected choose the registration you want to import racers from and “Create Race”.
Start List
Once you navigate to the “Start List” tab you will be asked to choose whether you want to “Split Racers into Start Groups” or “Keep All Racers in One Start Group”.
Keep All Racers in One Start Group: If you only have one distance, this is the recommended option . Some running races with various race distances also choose to start all racers in one group. This is generally only feasible in small races and can increase the chances of racers completing the wrong course. This should be taken into account when selecting this option.
Split Racers into Start Groups: This is the recommended option for the majority of running races. Start Groups for running races are usually defined by the distance that racers choose as well as gender. As such, when you go to configure your Start List you will choose to “Define start groups using racer fields” and then select the field from your registration form that corresponds to the distance racers registered for and their gender.


Once this is done you can “Assign Racer Numbers” and “Assign Start Times” as described in the Configure Start List documentation.
Device Setup
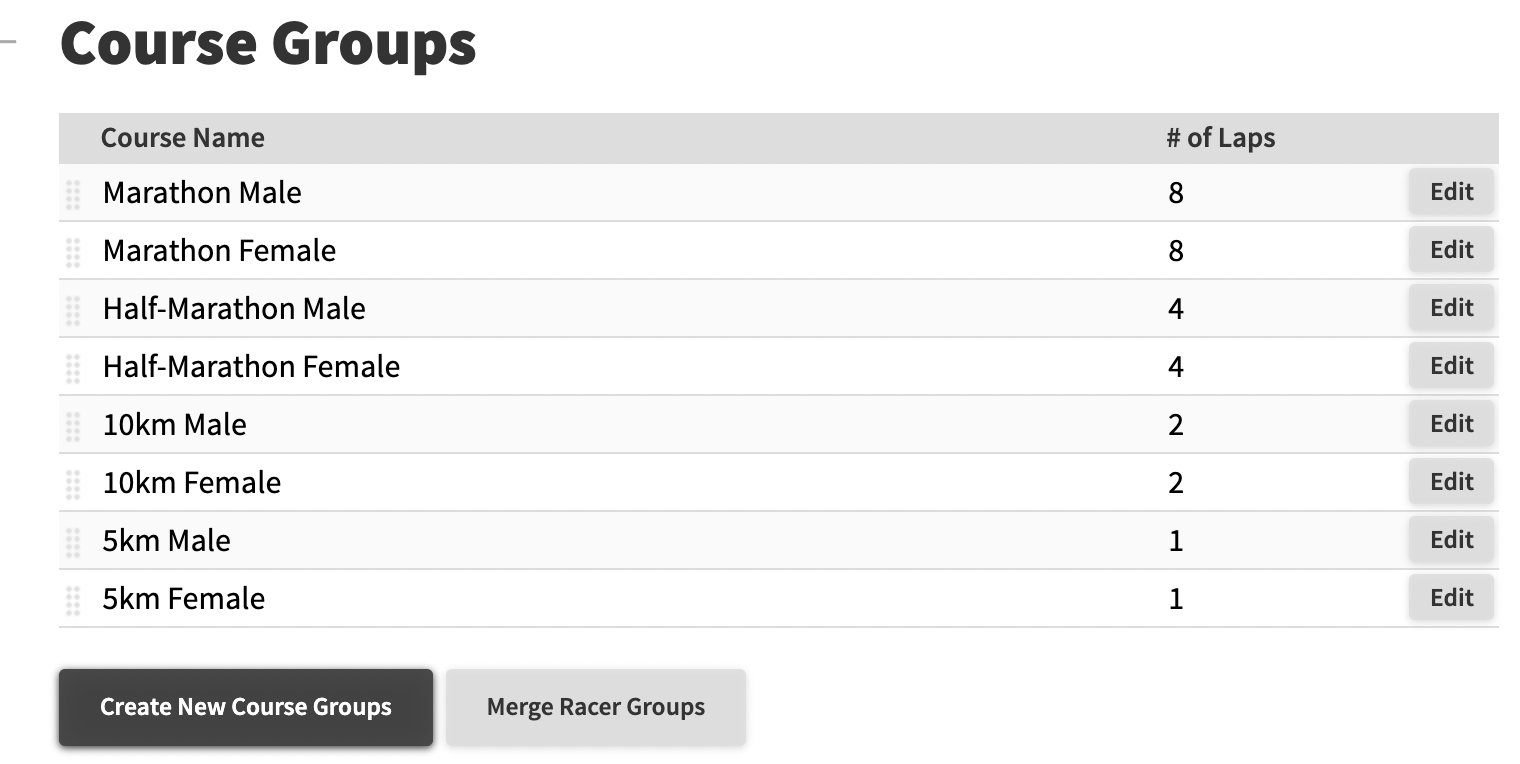
Racers should always be divided into course groups based off distance.

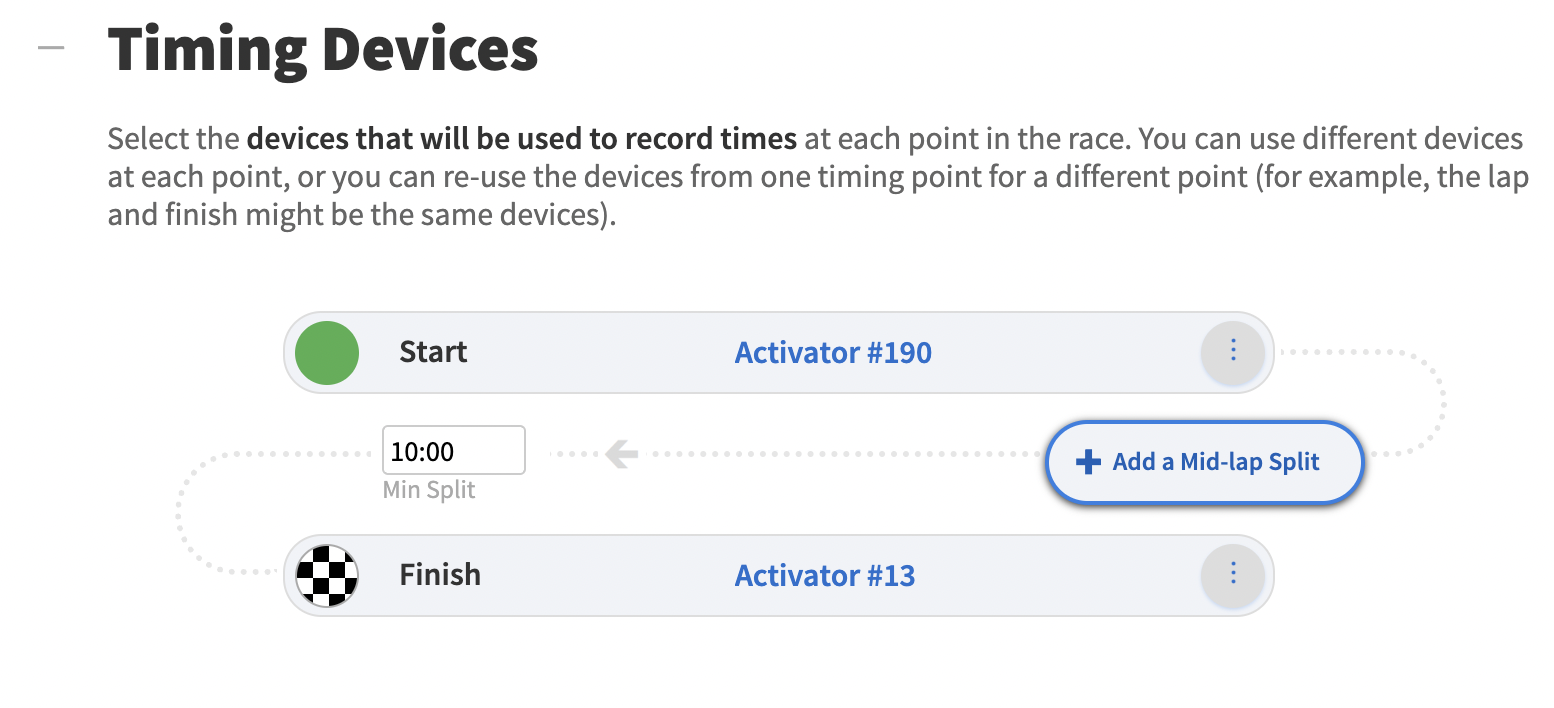
It is also recommended to give groups a minimum split. This will make recording false times for racers less likely. If one course group is doing multiple laps and you are planning on recording lap times then set the number of laps in the window provided. Pictured below is what your course setup might look like.
Tip: You should also consider setting up a pre-call for your race, especially if you have an announcer. Pre-call is a timing point racers cross 10-20 seconds before the finish so that the announcer can call their name before the finish. This feature is very popular for running races and adds to the atmosphere and racer experience at your event.
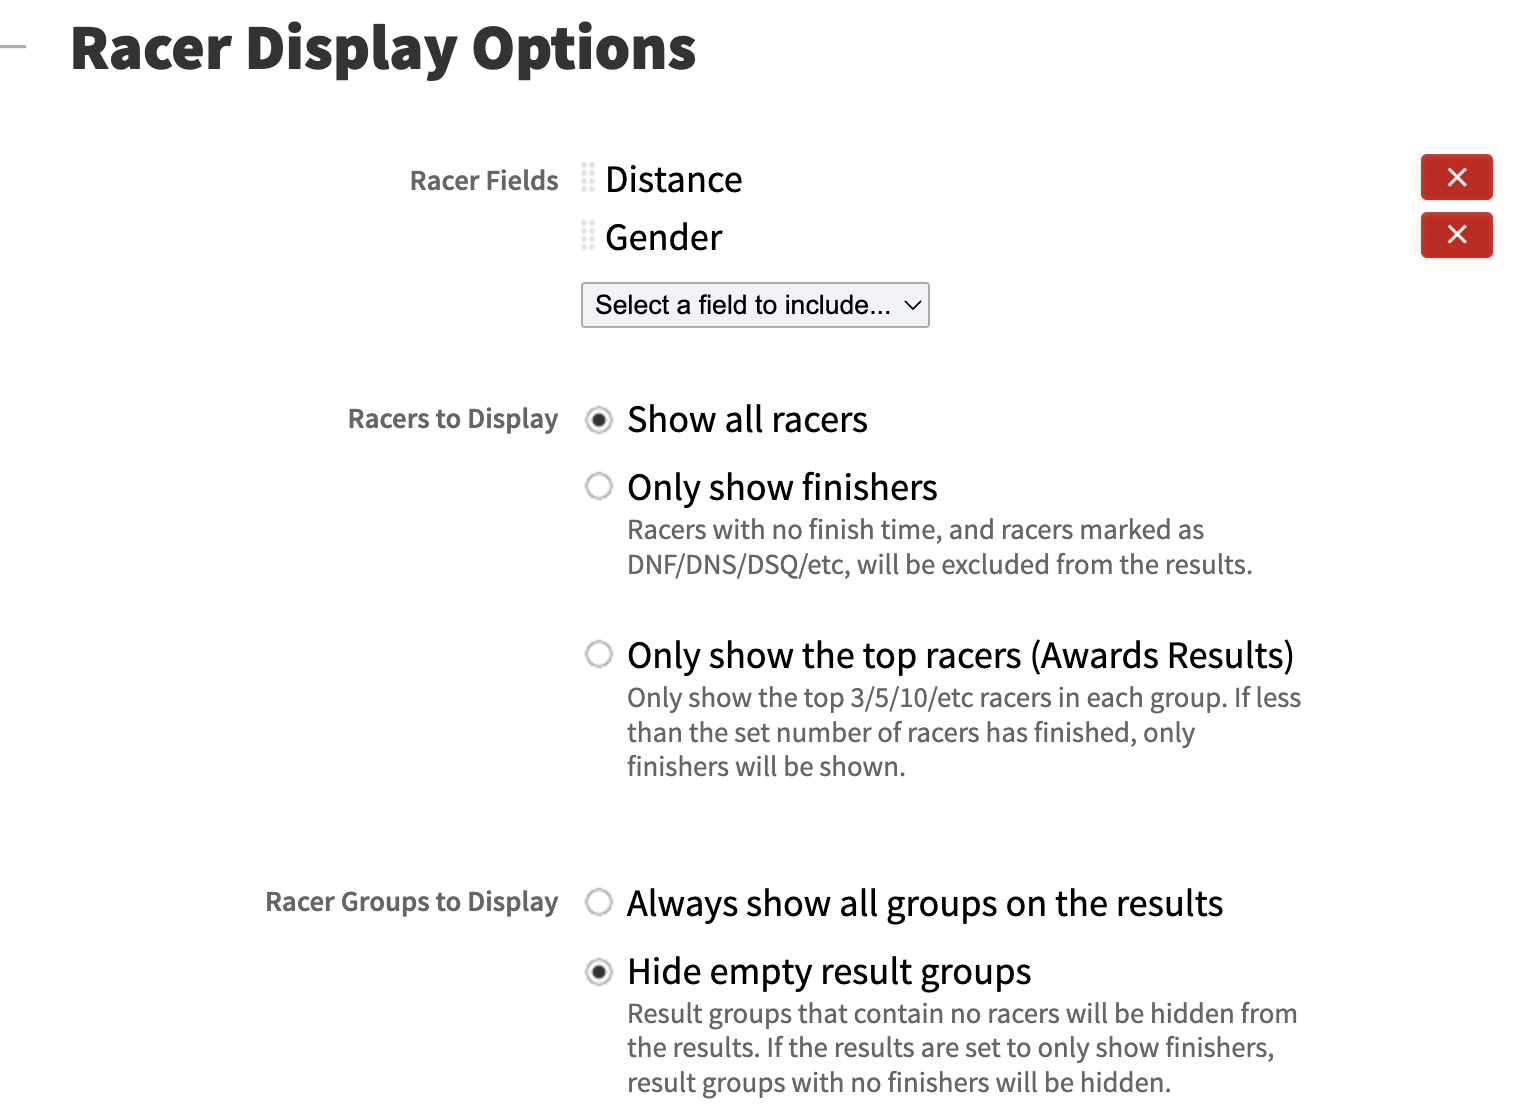
Generally there is demand for two different types of results in running races. These are; racers overall position in their distance and their age group ranking. All public results sets should have the same settings chosen and similar fields displayed. Recommended settings are pictured below.
Age Group Results
This is generally the results set that is in the highest demand at running races. When you create your new results set you will want to choose to “Create New Result Groups”.
You will then want to select Gender, Age and Distance as your three fields. For age you will need to set age ranges for the groups. What these age ranges are will be up to you but Running races typically use 5 or 10 year categories. Once this is done your “Create new results set” page may look something like what is pictured below.
Warning: If you have set date of birth as a registration field rather than age you will need to “Calculate age from Date of Birth“. This will use the DOB to assign all racers an age and create an age field.

Remember you can always change the names of these groups once they are created.
Overall Results
Choose gender and distance for overall results sets.
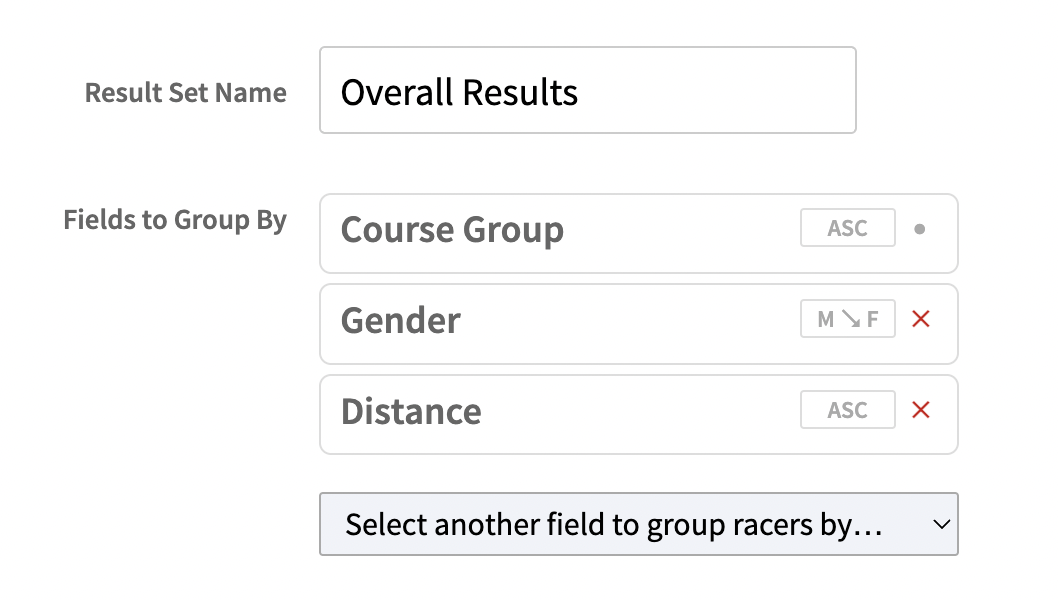
Make sure all the settings in the “Configure” are correct. Then add fields to display on results. It is recommended to add bib number (Racer #).

Publish
Once your results sets set up you can make the Overall and Age Group results public.
