On Club Overview click Edit Banking Info:

Click Stripe Account:

Click Connect with Stripe


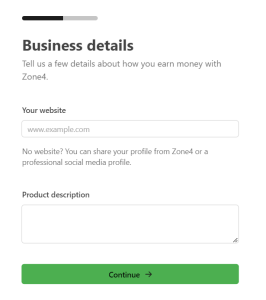
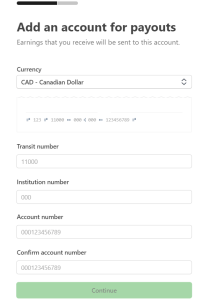
Select continue to fill in the application for a new stripe account, or to connect your existing account. Below is a screenshot of all the information you need to setup your stripe account. Note that you will need to have the following pieces of information handy:
- Business Number (TaxID)
- Personal SIN Number (TaxID)
- Bank Account Number, Transit, and Institution Code.

Upon finishing the application and clicking “Authorize access to this account” you will be taken back to Zone4 and Zone4 will be linked to your stripe processing account. You are now ready to accept live registration payments on Zone.ca
When you receive the first live payment on your stripe account, you will receive an email from stripe similar to this notifying you of the payment, and payout details (payout to your bank account) is usually 1 week after payment is made for new accounts.)

You may also receive an email some weeks later requesting that you provide photo id to prove your identity. Have a piece of photo id (passport, drivers licence, or photo identity card) ready and follow the instructions in the email to login to your stripe dashboard.

In your dashboard click “Verify Now” on your name.

Click Start Verification.

Select the issuing country and ID type.

Use your webcam to scan your ID or upload an image that you have already scanned into your computer.

If Uploading an existing image, select Choose File.

Once the upload is complete, click Confirm if the image looks correct in the preview.

After initial verification, it should display the above message and click Done.