Kiosk Mode Introduction
Although in most cases registrants sign-up for events online using their own device, there are occasions where it’s useful to have people sign-up on-site. Examples where this is useful are:
- Race day registration at package pickup
- Hosting a club signup day and having people register on-site
- Selling memberships and trail passes at your clubhouse.
In these scenarios, a staff member or volunteer is usually put in charge of entering new registrants into the registration system.
Kiosk mode allows you to have fields in your registration form that are only visible when the registration is being done on designated computers (the ones on site). This means that the staff member or volunteer doing the day of registration can have access to fields that are not needed for those who register ahead of time using their own device.
An example of such a field is a “bib” field at race package pickup. (See Optimizing Package Pickup for more ideas on this subject.)
In some cases (especially large running races) it’s more efficient to hand out race bibs with each registration instead of having people register themselves, complete checkout, and then having to find them and assign a bib after they have completed the registration.
You may also have special discounts, fee options, or program fields that are only available to on-site signups.
Kiosk mode also turns on the cash/ cheque payment method on that specific computer to allow additional options for on-site payment. Although most clubs set their desired payment setting to “Credit Card Only”, kiosk mode turns on the cash/cheque payment method for that specific computer
Kiosk gets rid of the Quicklist feature which streamlines the process for on site registrations by not storing previous registrants data. In this mode once one registration is done the system will automatically return to the beginning of the registration form making the entire process faster. 
Setting Fields for Kiosk Mode

When adding or editing a registration field, choose the Only display in kiosk mode visibility setting to make it display only during kiosk mode registrations. This is useful for a field like bib number, where participants signing up at home wouldn’t know their bib number yet and shouldn’t be able to enter one, but participants signing up at the venue can be given a bib right away and enter it directly into their registration.
Turning On Kiosk Mode
Kiosk mode is turned on with a kiosk code that is set on your registration form.
1. Ask for a kiosk code. Email support@zone4.ca with the name of your registration form (or a link to it) and the date you need kiosk mode. Please ask a few days ahead of your event. We'll set a kiosk code on that form and send it to you.
2. Enter the code on each kiosk computer. On the computer or tablet you'll use for on-site registration, open the public registration form. You don't need to be logged in as an administrator.
Click Contacts in the top right corner of the form, then click Enable KIOSK Mode.
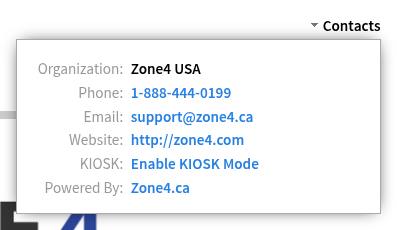
When prompted, type your kiosk code and click OK. The form reloads in kiosk mode, with your kiosk-only fields and the cash/cheque payment option.
If the code is wrong, the form reloads normally and Enable KIOSK Mode is still shown in the Contacts menu. Check the code and try again.
Repeat this on every computer you want in kiosk mode.
Turning Off Kiosk Mode
A computer stays in kiosk mode for 7 days, or until you turn it off. To turn it off, click Contacts, then click Leave KIOSK Mode.
Keep your kiosk code to your staff and volunteers. Anyone with the code can turn on kiosk mode, including the cash/cheque payment option. Once your event is over, email support@zone4.ca and we'll remove the code.