Biathlon relays are a complicated format and rarely used in our system. If you’re timing a biathlon relay, expect it to be difficult and complicated. Run a practice race ahead of time to make sure you understand how it works.
There are many variables that may affect how your race will go. These can include, but are no limited to; whether or not you have relay bibs, the number of racers on a team, the type of timing devices you are using, and the specifics of your course and stadium set up.
If you need help, reach out before the race. We want to set you up for success, and it’s easier to do that before hand, rather than after the race.
Below is overview of the steps to time your relay
Assigning Bibs
This can be done in Zone4 or in a CSV before upload. Depending on what you have available for bibs, you can either assign one number to all team members, or have each racer use a different number. Those choices can affect your race.
You can learn more about assigning relay numbers here.
Here is how the CSV should be built:
- In example 1, each team is under 1 line on the csv file.
- In Example 2, each racer is one line, and the Team Name field is identical for each team member
- Either method works, but if you want to assign unique bibs for each racer in Zone4, you must import Racers
- *You can assign multiple bibs to teams outside of Zone4, but this will mean you cannot collect shooting data*
For the purposes of this article, “uploading Teams” refers to a CSV upload where the Teams are treated as athletes, and are a single line on the CSV. “Uploading Racers” is when you upload a CSV with each racer on a single line, and use Zone4’s team function to combine them.
How to create the race:
- Choose these settings:
- Make sure to set up the class or category to option field

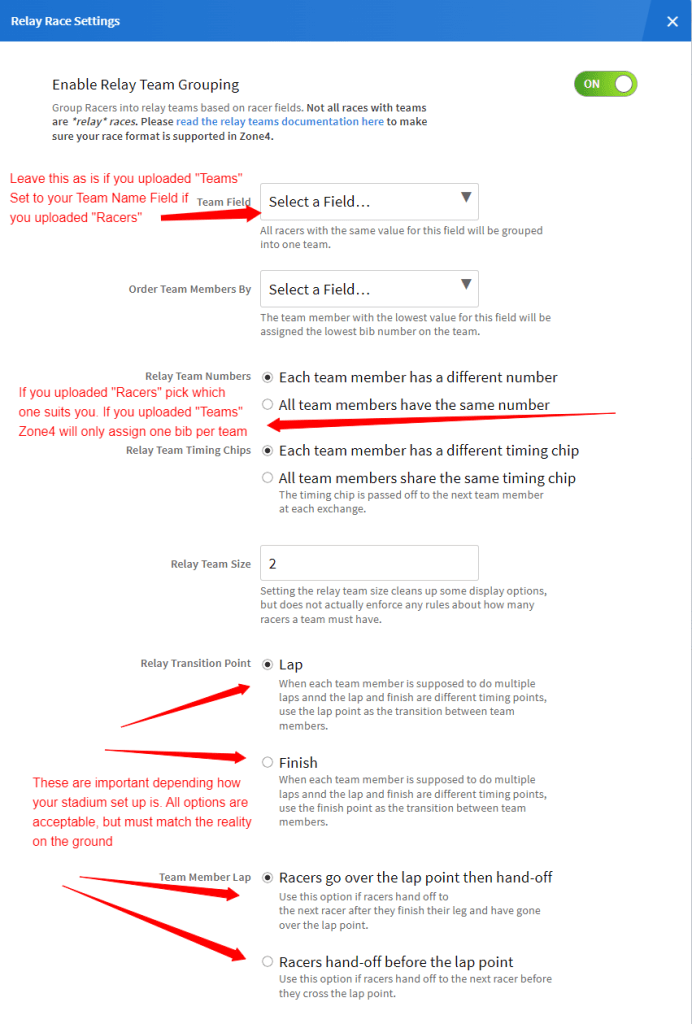
Relay Race Settings
Once you have the race file, you’ll want to make sure Team Relay options are on. They will need to be on even if you uploaded teams and are not using that tool. If that is the case, leave the Team Field set to the default, and set up the rest based on your race specifics
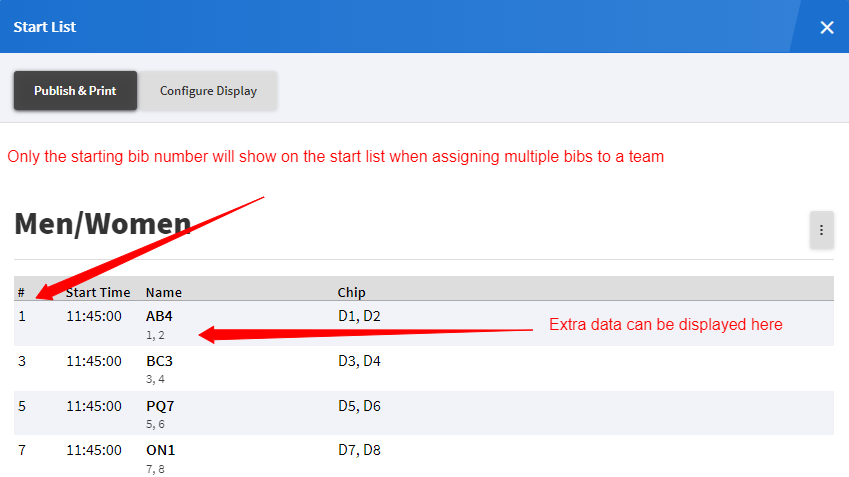
Start List
You can divide your racers into Start Groups as you need to, and assign racer numbers and start times. If you uploaded Racers, and chose the “Different Number” option, you’ll notice only the first bib will be displayed. You can see all the bibs if you add Bib number to the Race Fields to display, under the configure options. You can also choose to display the Team Member names.

If you uploaded Teams, keep in mind that you’ll have to change the number of chips per racer to match the number of racers on each team

Course:
When setting up the course, you want to enter the number of Racers per Team, and the number of Laps per Racer. The Range column should match the shooting pattern for the entire team. *Note the Dev Categories below are 2 person teams, with three laps, so shooting pattern is PSPS, or four bouts, compared to six for the three person teams*

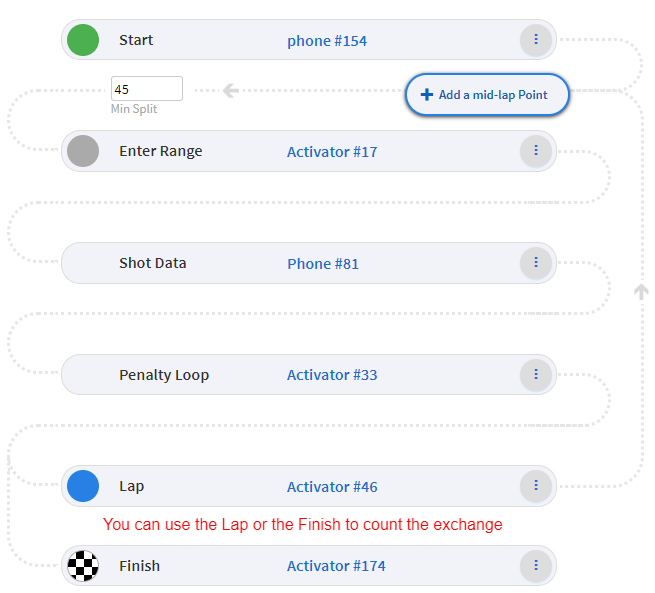
See below for the recommended timing device set up. The first example has two Lap activators. This is for when you want to use the Lap timing point to record exchanges. The regular Lap point should be placed at the end of the stadium, which makes it awkward for the exchange zone. If you don’t have enough activators, or if you are running the exchange over the Finish point, you can use the setup in the second image.
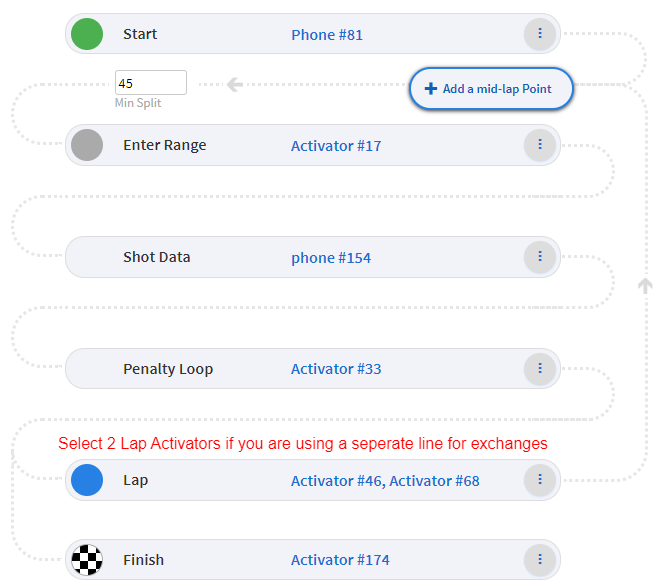
As in all biathlon races, your min split should be less than the minimum range time; that is the time between crossing the Enter Range timing point and the Lap timing point.
Time and Data Assignment
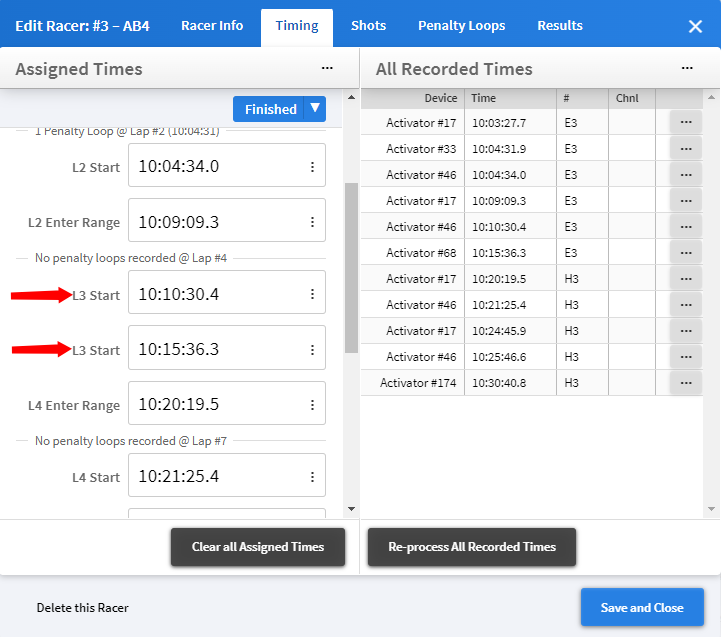
You should see time assignments as you normally would. There are a few things to watch for though. One is the times at the Exchange. Notice in the example below, there are two L3 Starts. The first one is when the first racer gets back on course after leaving the range. The second is the timing point in the exchange zone. It’s good to keep an eye on these to make sure that they have assigned correctly.
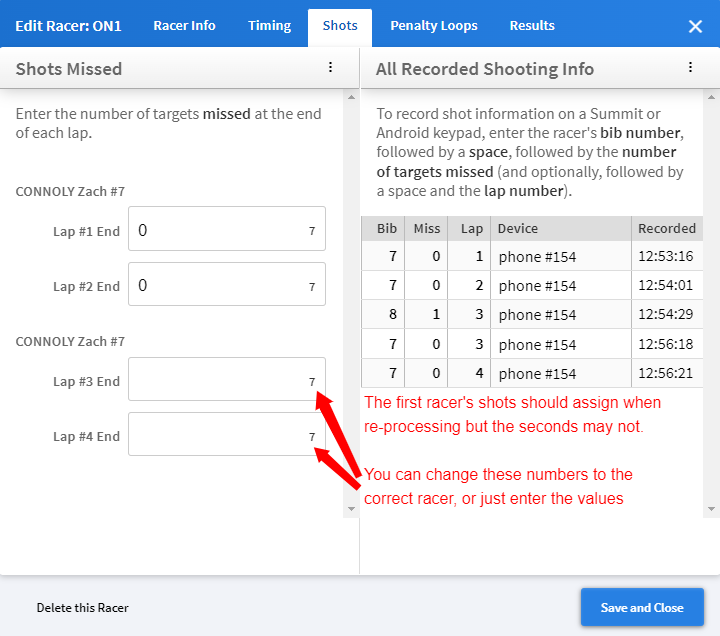
The Range and Penalty loop data can get complex depending how you set up your race. If you uploaded Teams and have the same racer number for all the racers, you should see it happen as it would in any other biathlon race. However, if you uploaded Racers, and especially if they have different bibs, you might have to enter the Range Data yourself. You should at least see it in the shots window though.
If you ignored the suggestion about bib numbers and ended up with weird numbers (such as “21,22,23”) as your bib number, you will not see the shooting data and will have to look under the Recorded Times List to see the scores.
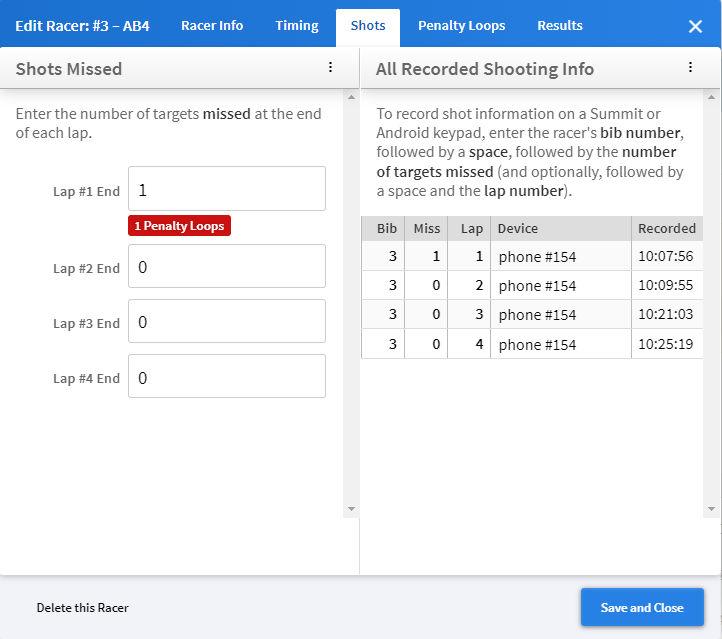
As clean shooting is very common in a relay, remember that in order to display a score of “0” misses, you will have to enter another number, (1-9) and then change it to 0.
Results
If all goes well, the results should look like this:

Canadian Biathlon Champs 2 person Mixed Relay – https://zone4.ca/race/2024-03-31/79877ee6/results