Important Notes
- The battery voltages listed here assume the chips are at room temperature. If you are testing chips while they are cold, they will all report low battery. Make sure the chips have been indoors for at least 1 hour to warm up to room temperature before testing.
- If your chips were purchased from Zone4 before July 2018, a bug in the battery status reporting means voltages will not be accurate unless you test using a phone running Android 7 (Nexus 5).
- The chips must be in the field for at least 5 seconds for the battery test to be accurate. Test slowly and thoroughly!
- For Zone4 Staff replacing rental chips, Use the replacements tool in shipping admin. you need to be signed in to view that link.
Setting Up
Set up a timing loop according to the directions here: GoChip Hardware Setup Guide.
Finding the Chip Tester
When you have set up a loop and have a phone turned on, find the settings page for your GoChip Activator by clicking on your club name in the Settings menu. This will open the Organization Settings page:

Click on the Timing Devices button to open a list of all your timing devices

Find your activator number in the list of connected devices:
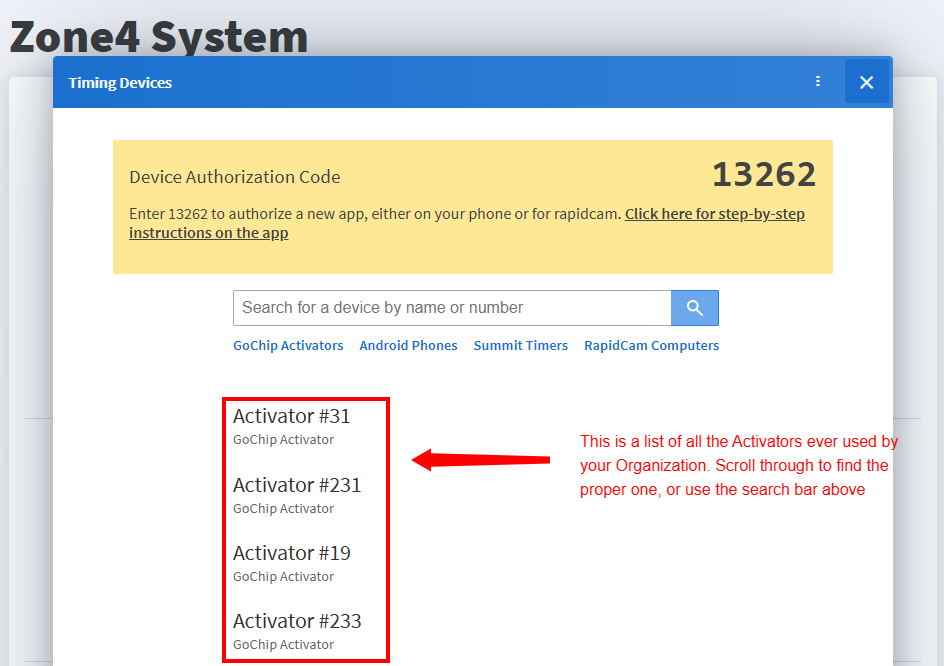
Select Chip Tester on the lower right hand side

Testing Chips
- Hang your chip rack up and give them a good shake. Chips fall asleep if they have not moved in 10 minutes
- Turn on the GoChip Activator you selected and wait for it to sync
- Turn on your Android Phone and open the Zone4 GO App
- Attach your Timing Loop to the Activator
- When all lights are solid GREEN you are ready to test!
- Hold the loop over the chips and pass over each chip slowly in a sweeping motion. Each chips should be inside the wire loop field for at least 5 seconds.
NOTE: the chips must be in the loop field for AT LEAST 5 seconds for the battery test to be accurate. Test slowly and thoroughly!
As you pass the Timing Loop over the chips, the GO App should beep as it reads the Chips. The test page will fill in as the chips read. Before you start reading the page will look like this:

As you scan, the chips will start to appear:

Missing Chips will be highlighted in red. If a chip appears on the list with out the red (as do all the chips above), the chip is reading. The other columns will fill in as the data fills in from our system.
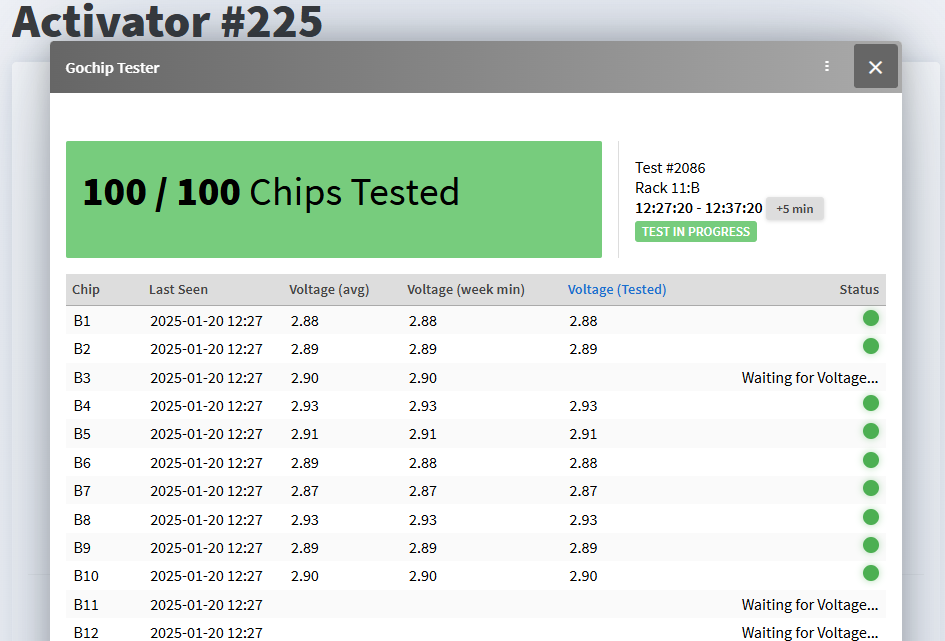
Once all the chips have been read, you will see that indicated by the banner at the top.
The tester will only display chips from the first rack that it gets data from. If you have multiple racks laying around and the first read that comes is not from a chip from the rack you are trying to test, you will not see any of the proper chips appear. Make sure to separate all racks, and click the Reset button at the bottom of the test to start again.

Testing the Chip Batteries
Although GoChip batteries are designed to work for several year and rental racks are tested each week before being shipped out, it’s always good to test them after long travel or occasionally during a long term rental or ownership. This test will display the voltages of each chip. There are 3 different columns for voltage that tell us different things, however the most important is the Voltage (Tested) column on the right
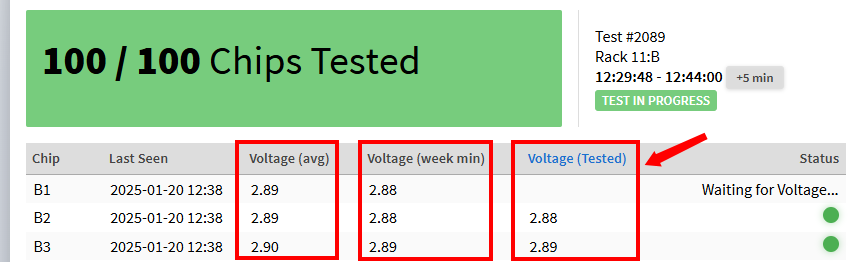
This will display the voltage from the current test. The other two columns are an average and a weekly minimum. This are useful for Zone4 Staff tracking rack health, but can be misleading, as they may include data from chips that have been replaced. When you are doing your test, focus on the Voltage (Tested) column. Anything over 2.50 will be good for your event.
The voltages can take a while to come in on the test. Each test has a time limit, seen at the upper right. You can increase this time by clicking the +5 min button, which will add 5 minutes to the test.
If you have a few chips that are showing as read, but are still waiting for voltage, it’s a good idea to take those chips one by one and scan them individual over the loop. If you hold them in the loop for 5- 10 seconds that usually is enough to get the voltage data to record.
Interpreting the Data
When looking at the chip voltages there are several indicators on the health of the batteries. Any new or recently refurbished rack will show all green indicators, however that does not mean that chips without the indicators are problematic.
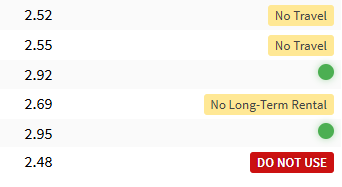
No Long-Term Rental: If you see this on a chip, it indicates to us that it might not last six months of heavy use. If you are renting the chips for a weekend event, or have less than six months in your season rental, you can be confident in this chip.
No Travel: Shipping can be rough on a chip’s battery health, especially in the winter. The cold and constant motion of the back of a Purolator truck will drain the batteries. This indicator means that we should not ship the chip from our office, however if you see it right before your weekend event the chip should last, it just might die on the truck back to us.
DO NOT USE: As the name indicates, this chip is not in good enough shape to use. It is reading so it is currently working, but the voltage is so low that we can’t guarantee it will work. Only use in cases when you have and accurate form of back up, and only if necessary.
If you are concerned about the chip status, our Zone4 staff can look at a test and help create a plan.
Once you are finished your test, you can either close the Testing window, or click Reset to test another rack.