As of April 2024 we have tweaked the format options to allow more flexibility and easier support for races.
Preset Formats vs Custom
After selecting your sport during racefile creation, you’ll see a list of preset formats. These have been built to make it easier to time your race without having to customize a lot of options. For example, you might see a Mass Start or an Interval Start option. Picking either of these will help you set up the indicated race type.
However sometimes you might to create a course setup that is not covered by one of these formats.
The Multi-Sport Example
It’s not uncommon in the Multi-sport/Triathlon world to combine different multi-sport races on the same event day.
The default race format is in Zone4 for multi-sport events is built with two transition zones, meaning three different legs (eg, Swim,Run,Bike). This is fine for Triathlons and Duathlons, but for other races that only have two legs, this will leave large blanks on the results page.
This is where custom courses come in. By selecting the custom course format, you can choose each and every timing point that your racers will cross. This allows you great flexibility when building your race file, and will ensure your course groups are properly set.
Creating a custom Race setup
The first step is to select the custom race format. When you go to select your race format, you’ll see an option to not use a preset set format.
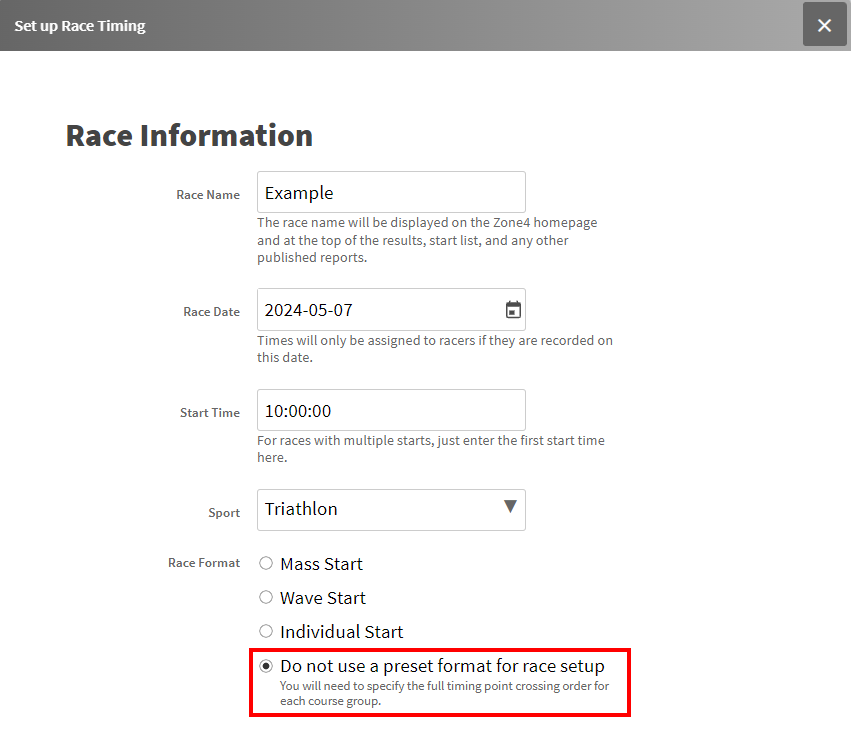
Selecting this option will allow you to build a custom course or courses for your event.
Building the Course(s)
The rest of the racefile setup can be completed as normal, but once you get to the Courses tab, you’ll start to see the differences. Once you divide your race into the Course Groups that you need, you’ll notice the Timing Devices section is blank. This is because you’ll have to set the timing points individually for each course group.

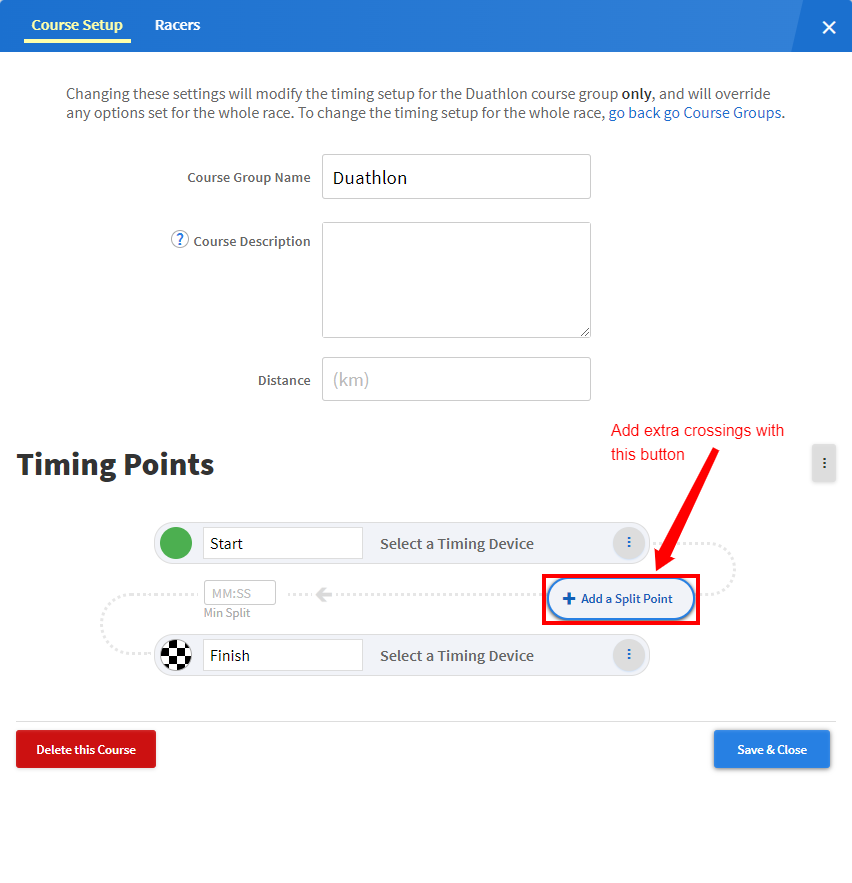
To do this, select the Edit button for each group, as highlighted above. This will bring up the normal edit course screen, but below that you’ll see the Timing Points section. The start and finish points are present by default, and you can add whatever other points you need by clicking the Add a Split Point button.
Setting up Laps
One thing to keep in mind, with custom course setups, is that there is no Lap feature. This means that you cannot simply add a Lap point, and then tell Zone4 how many laps the racers will do. Instead, you’ll have to add a crossing for each time the racers will pass over the Lap point. In the example below, you’ll see how a race with one Swim and three Running Laps would be set up.

Major Points vs Minor Points
By default, all the timing points you add will be classified as Minor Points. However, sometimes you will have timing points that are more important to your race, or that indicate a change. In our multi-sport example, this could be the transition zones. In order to highlight these timing points, click on the ellipsis on the right of the crossing. Next, select Major Point from that menu. You’ll notice the circle on the left will now turn blue to indicate a Major Point.
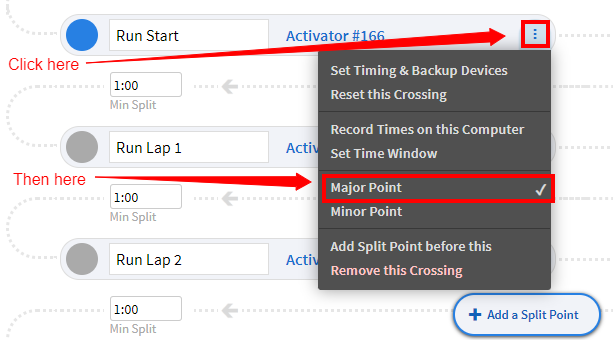
One of the benefits to doing this is how the results are displayed. Times are calculated to the previous Major Timing Point (the Start is a Major Timing point), so by setting these selectively, you can display times for each lap as well as the overall time.
Also note the Remove this Crossing option. This is useful if you made a mistake and need to remove a crossing from your setup.
Copying a Course Setup
It’s likely that if you have multiple course groups on the same day, that they will reuse many of the same timing points in the same order. There might be small changes to the number of laps, as an example, or they might use a single different transition zone entrance or exit, but the other crossings might stay the same.
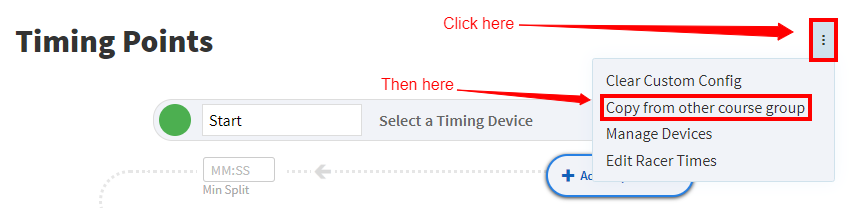
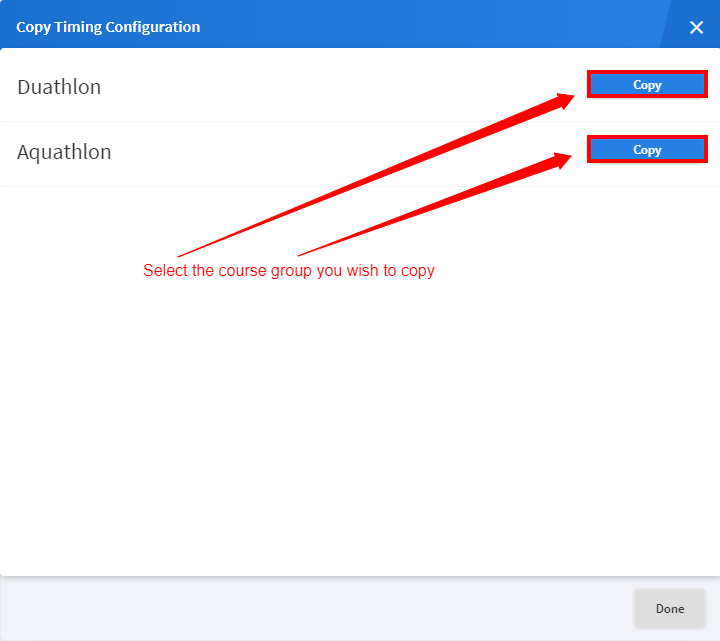
In order to save time in these cases, it is possible to copy the Timing Points from one crossing to another. To do this, first bring up the three-dot menu to the right of the Timing Points header. Then select Copy from other course group. This will open a window showing any other courses that you have already built. Click on Copy to copy the wanted timing configuration into this other course. You can then edit it as desired.